How to Draw a Perfect Circle With Your Hand

Learning how to draw hands can be a challenge. Even experienced artists take to study this skill with a dedication to master information technology. The human hand is a complicated piece of anatomy – and one of the most crucial – and then learning how to draw easily is a vital skill.
This article includes two central lessons: on this beginning page, the concept artist Brynn Metheney shares a uncomplicated pace-past-step guide for drawing hands, including tips on how to break downward the forms of the mitt into simple shapes like cylinders and spheres. From there, you can click through to folio two for painter and graphic designer Stan Prokopenko'southward in-depth look at the anatomy of the hand – after all, you need to understand the underlying structure, in order to learn how to draw hands with accurateness and confidence.
To add to your practice on drawing hands, also see our guides to how to describe an arm, and how to draw a face up. For more general drawing tutorials, see our piece on how to draw.
01. How to describe hands: a look inside

The human mitt comprises bone, tendon, lots of connective tissue plus musculus and fat. Information technology's a strong and flexible appendage. Getting to know how information technology's formed and how it works can really assist yous learn how to draw easily. It can be helpful to sketch out skeletal studies of human beefcake in general but, when learning how to draw hands, a lot of the form we know is lost at the skeletal level.
However, if nosotros overlay a surface view on top of the skeletal view, nosotros tin begin to appreciate where the skeleton sits within our hands. Click through to page two for an in-depth expect at the anatomy of the hand, and then you can showtime to understand how the mechanism works and use that knowledge to inform your drawing.
02. How to describe hands: Break the hand into shapes

Tou can lay in broad shapes over the skeletal view in order to build the hand. Apply a flattened wedge-like shape for the palm; rectangles for the digits and a teardrop shape for the thumb. You tin can apply the skeletal image in a higher place as a base of operations for this step (click on the icon in the meridian right to overstate the image).
When learning how to draw hands, simplifying the forms similar this will help to remove the pressure level of rendering out a perfect hand from the start. From here, y'all can begin to make full out the shapes into 3D forms to help build the hand and pose information technology in perspective.
03. How to draw a paw: Build the hand in 3D

At present it's time to develop the forms to brand the hand feel more 3D. Here, our flattened wedge for the palm gains another dimension, the fingers become cylinders and the joints go spheres. We'll call this view of the hand the planar view.
By drawing through our forms, we tin show volume, equally yous tin can run across above in the palm pads. This is also a good time to piece of work on proportion and placement. Notice how the palm is near as long as the eye finger (the green lines indicate this). Retrieve that the fingers are never the same length or perfectly straight. What sells this is imperfection.
Note the blue lines indicating the bending at which the fingers end. We can also see that the middle finger stems straight from the middle of the manus. Paying attention to these proportions will help yous ensure your hands look natural and accurate.
04. How to draw hands: Posing the shapes

In one case you've fatigued out the 3D version of your first hand, you can try out some poses. Past breaking the hand into simpler forms and using contour to explore volumes, yous tin can start to arrange the hand in unlike poses without worrying likewise much well-nigh particular.
You can use your own hands as a reference, but use the planar view to aid keep it simple. This fashion, you lot can quickly draw out poses of easily without worrying too much about detail. In creating this tutorial, I found myself looking at my ain 2 hands quite a bit. Even so, if you lot need to use your own hands to sketch, you might demand to enquire a friend or family unit fellow member to help out.
Note the modest diagram of the cylinder and sphere to a higher place. Fingers can exist unruly at times – it's all-time to proceed them very simple and utilise 3D shapes to represent them at this stage.
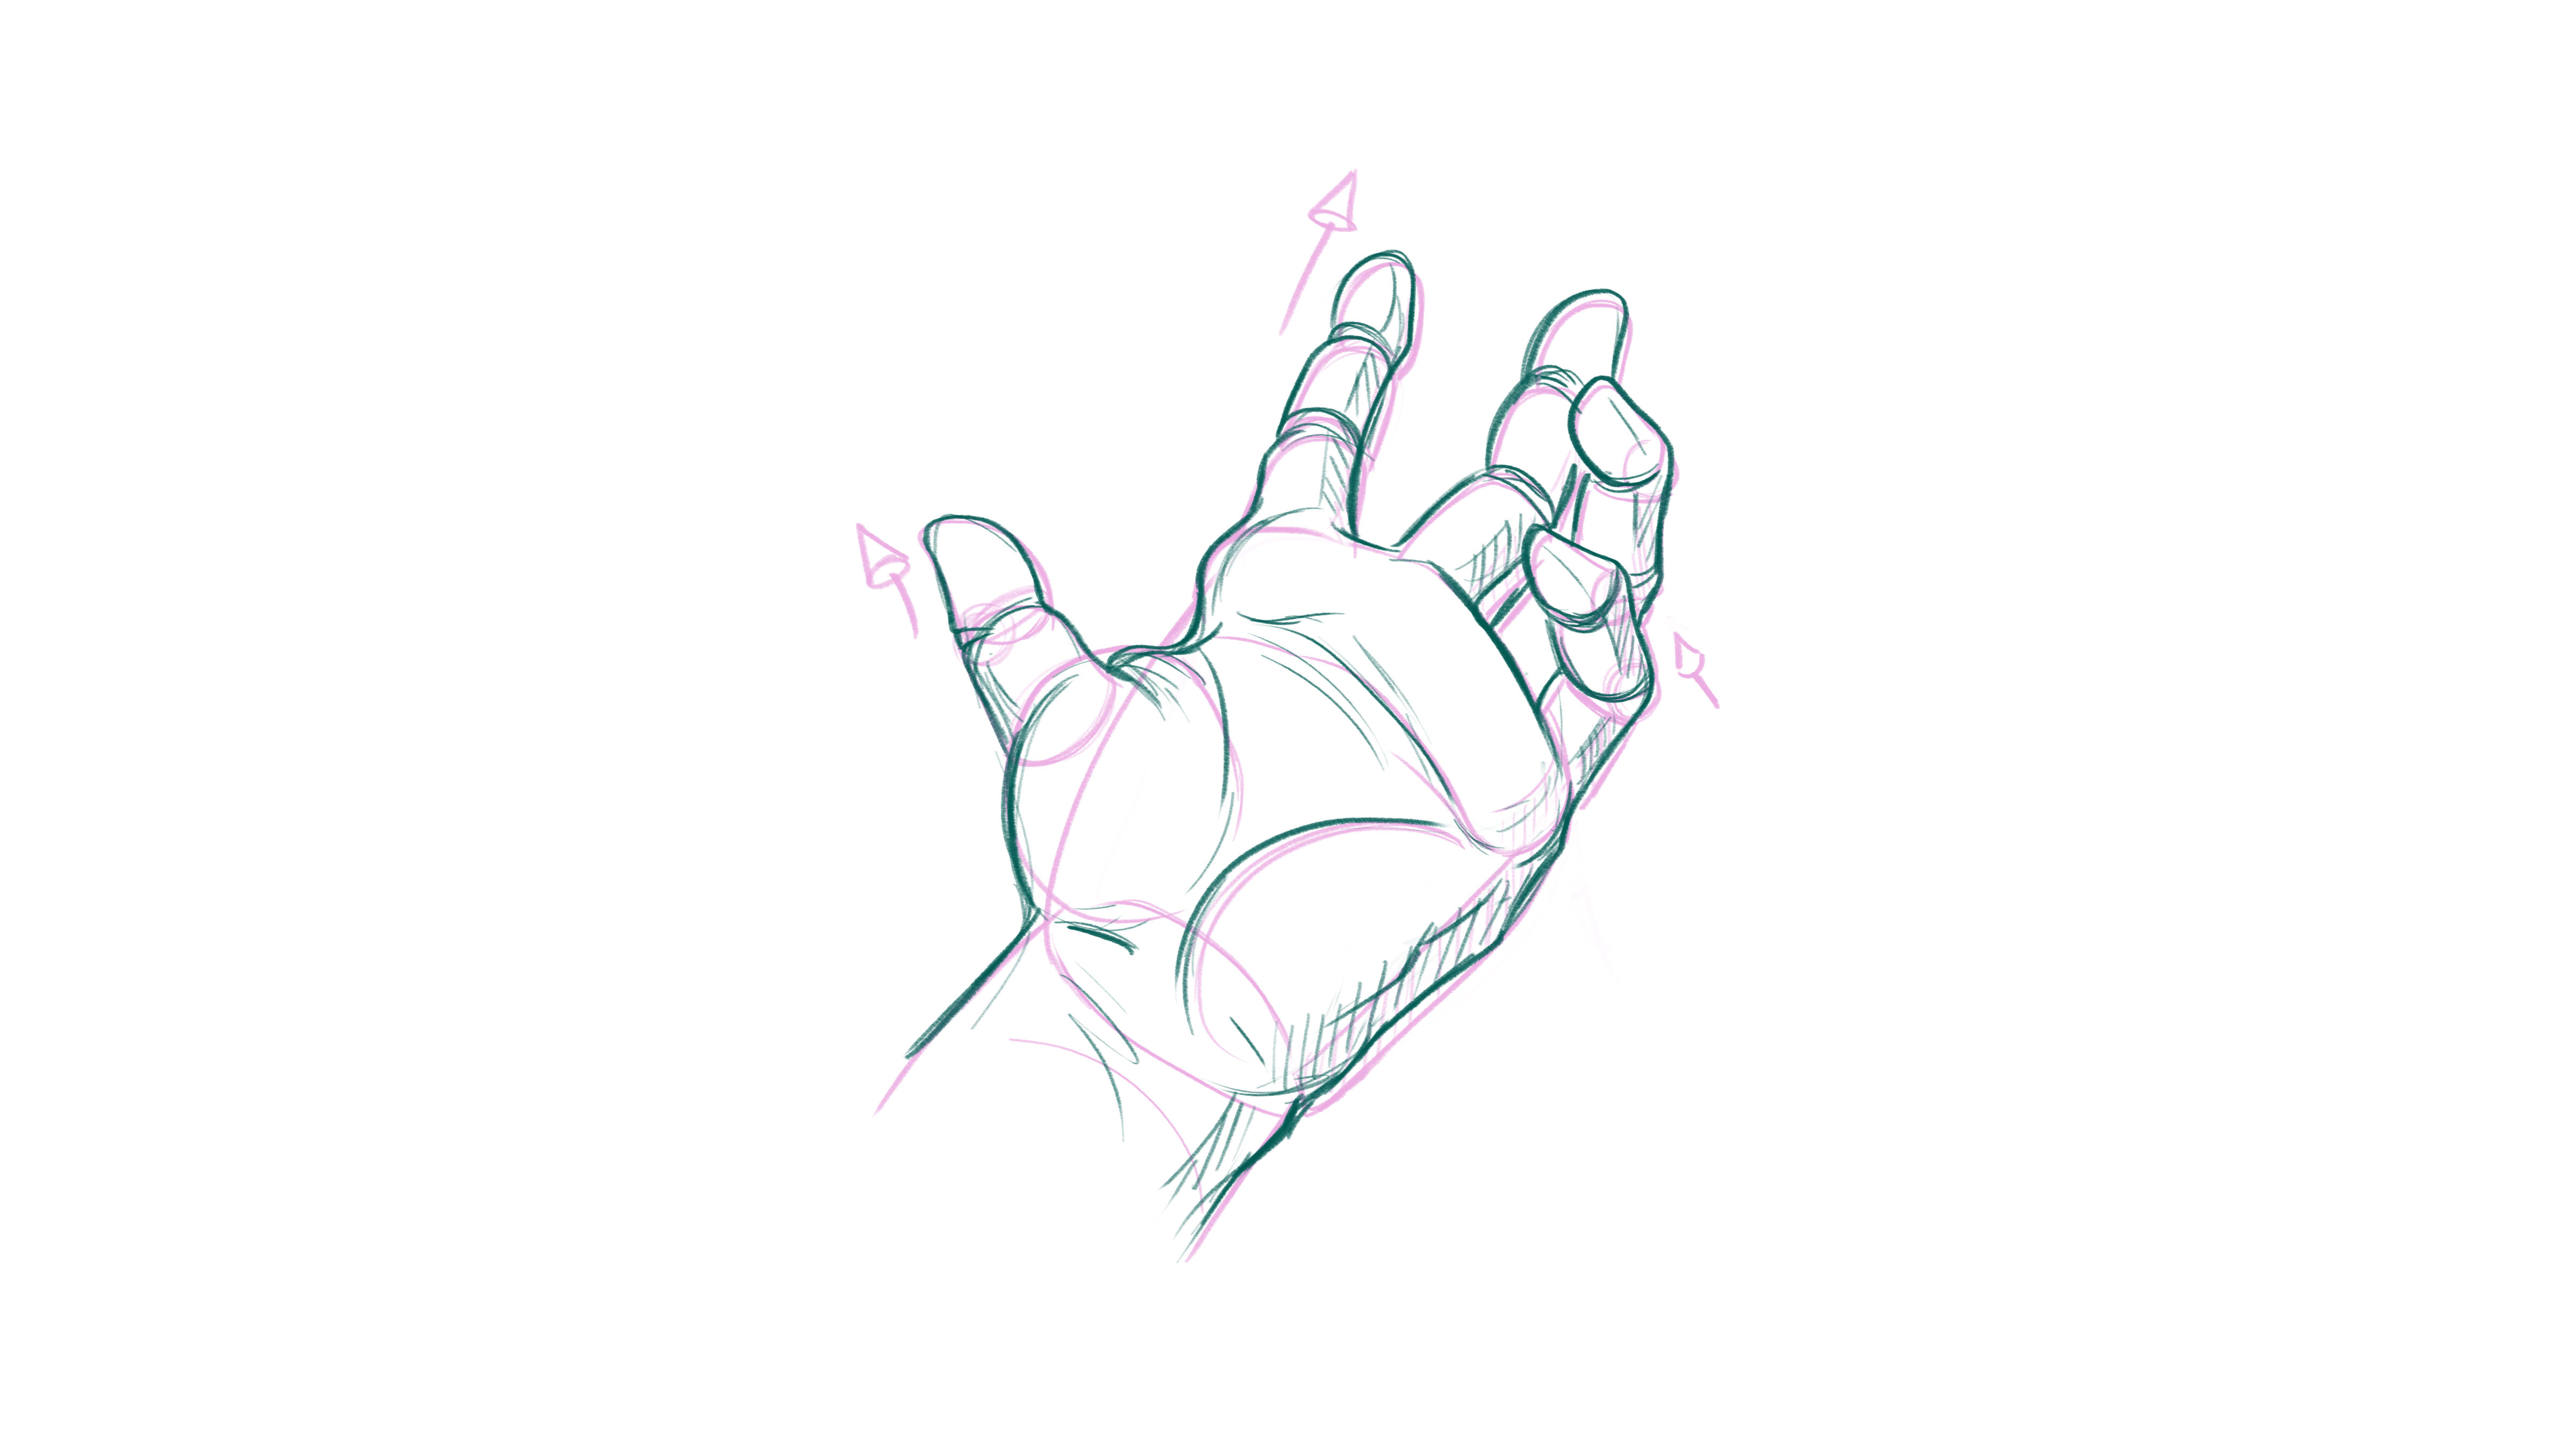
05. How to depict hands: Become started with planes

One time you lot've had some fun with posing, pick a pose that you similar and, using your ain mitt as a reference, draw out the hand in the planar view. In the sketch above, the little cones indicate which way the cylinders are travelling. This tin can help you to keep a grasp on where the curves of the cylinders need to curve.
Once again, we desire to keep information technology uncomplicated at this stage and not worry well-nigh detail. Y'all want to capture proportion, perspective and volume. Notation that it'south important to work lightly at this stage if yous're using pencil.
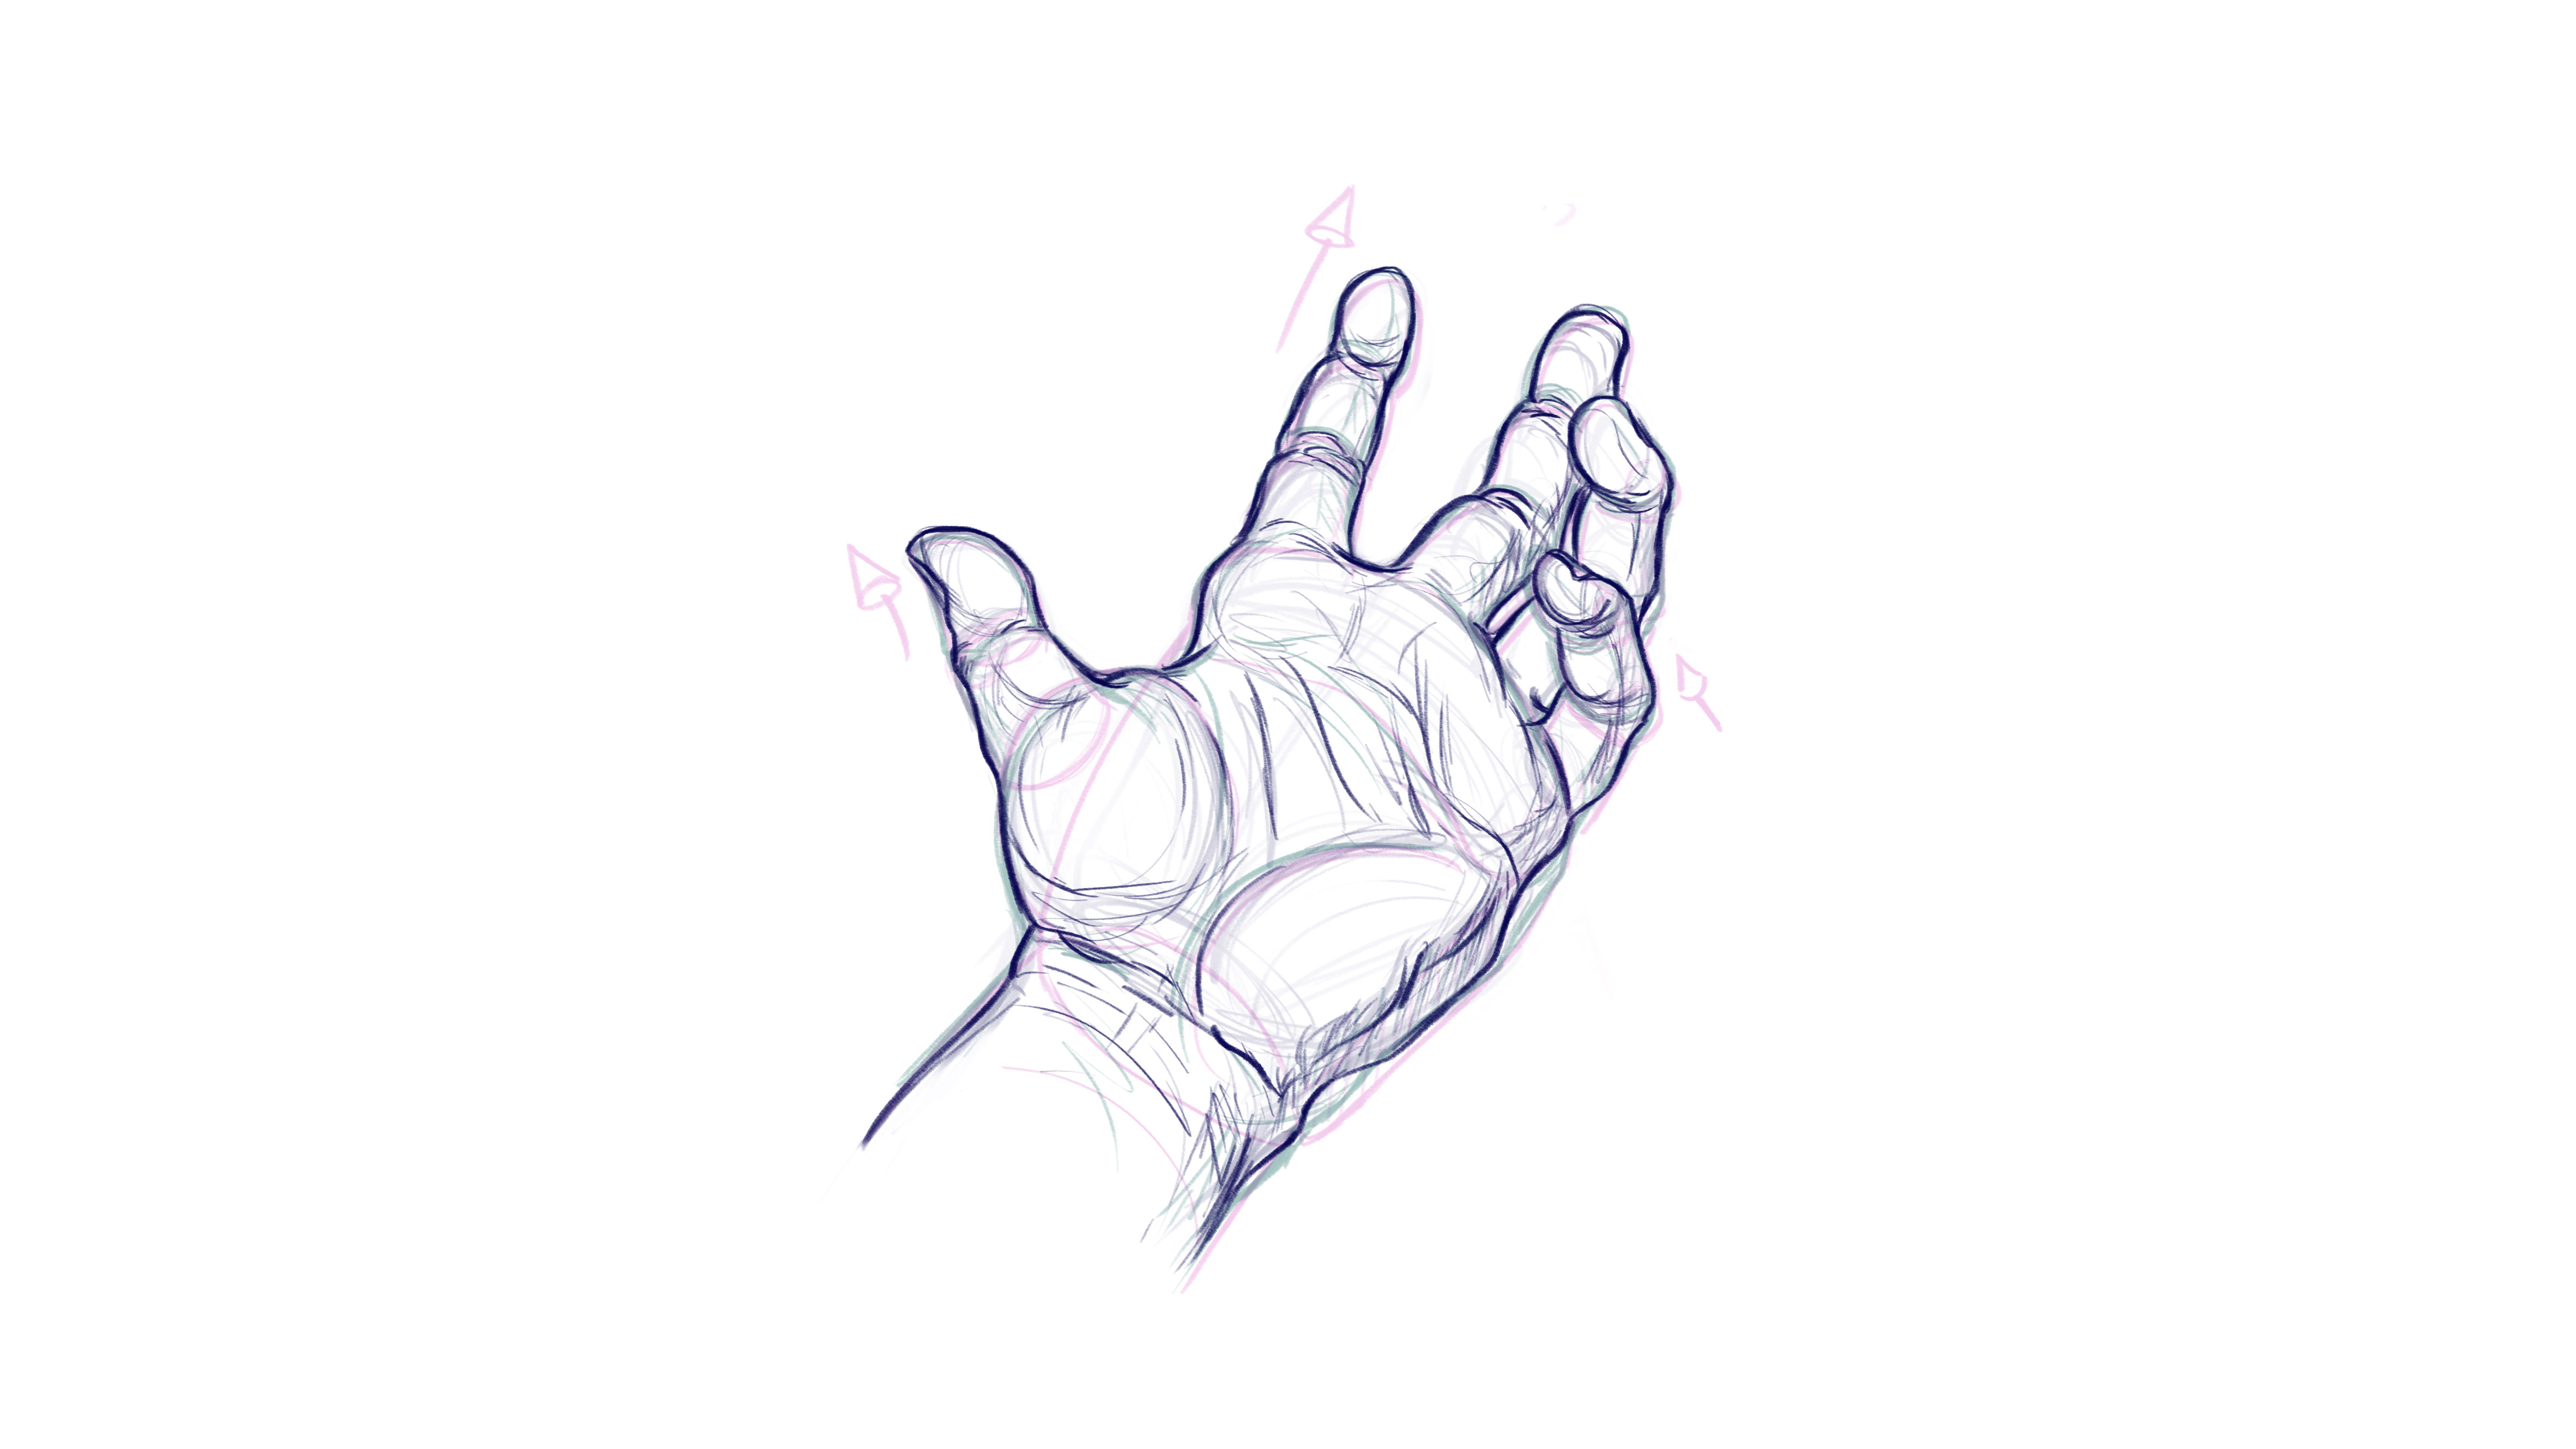
06. How to describe hands: Finding gesture and forms
Nosotros're working digitally in our examples, so I'll knock back the opacity of the planar drawing here to begin to find the forms I see on my own hand. If you're working traditionally on paper, be certain to start out light and gradually build up book and forms with heavier lead only every bit y'all become to the end of your study.
From here, you can use the planar view as a guide to help lay in the forms of your own hand as you look at it. Be careful to take note of how the forms curve around each other and besides deport in heed the silhouette of your hand. In the example above, yous can see where I've deviated from the pink line and instead used it equally a guide to find where the forms turn in infinite.
07. Drawing hands: Begin to lay in detail
Now you can push back the outset 2 layers, or switch to a heavier lead to begin to lay in those details. You can encounter how helpful the construction of both the planar view cartoon and the gesture cartoon actually help me place details similar wrinkles and creases in the hand. I tin can too begin to place fingernails and render out the side of the palm.
Next page: An in-depth await at the structure of hands
How to draw hands: more tutorials
Source: https://www.creativebloq.com/art/how-draw-hands-51620226
0 Response to "How to Draw a Perfect Circle With Your Hand"
Postar um comentário